| © Ken Roby
published in ANVIL Magazine, March 1998
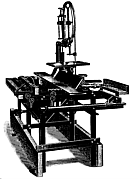
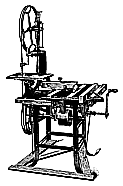
There are surely thousands of those small, cheap imported metal cutting band saws in use in blacksmith shops around the country. After many years of operation, my own such saw has mutated several times. With some simple and low-cost improvements, this simple, cheap saw does much more than just cut up steel, and it is not limited to just small tasks. You can save a lot of money by using these little inexpensive saws to do a lot of work; in fact, you might not have any need for a bigger saw. The first thing to do is to clamp a light on the saw head so you can see what you are doing. You may need to screw a piece of angle iron onto the saw for the lamp - do it. It's so nice to see where the blade is actually going to go. Most of these saws have a wonderfully simple shut-off mechanism - when the saw completes the cut, a metal tab on the saw head pushes the toggle switch into the off position. It works every time. However, starting and stopping is hard on an electric motor. Often, multiple pieces must be cut repeatedly and if the saw shuts off after every cut, it is both hard on the motor and an inefficient way to cut lots of little pieces. By replacing the toggle switch with a double throw center off-switch, you have a choice: with the switch in the up/on position and the shutoff tab on the saw head properly adjusted, the saw will complete the cut and push the toggle to its center off position, functioning as it did before. But put the toggle in the down/on position and the saw will run continuously, because the tab never reaches the switch. This is easier on the motor and faster for cutting multiple pieces - just don't forget the thing is always running! Another aid to multiple-piece work is the fence. My original saw had a very short 1/2" rod on which a sliding fence rode. I replaced the short rod with a longer 24" one. And for even longer repetitive cuts, a piece of conduit or pipe with a fence on one end and a bolt or clamping device on the other slides over the 1/2" rod, extending the fence even farther. Some of these saws are wet saws, but most are not. Being frugal, I simply made an inclined sheet metal drip tray under the cutting area of the blade. The cutting fluid (water-based machine tool coolant applied with the old, reliable oiling can) runs off the blade into the tray and down to the bottom into a can, where it is recycled and used again.
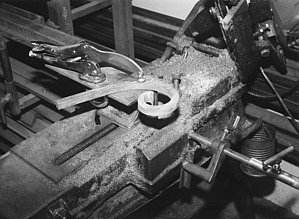
For really odd shapes (such as scrollwork) that do not fit into the vise jaws, a simple tool allows you to cut just about any shaped piece - a length of angle iron large enough to clear the top of the jaws is clamped into the jaws. A drill press clamp, vise grip or C-clamp will hold an odd-shaped piece right where you need it - but don't let the saw head drop down onto the table after it completes its cut. You do need to watch what you are doing. Two other modifications have been extremely useful in our shop. Raising the saw up to a comfortable height equal with our steel racks allows us to do our work without hunching over. I found that when cutting several hundred pieces in a row, lifting the saw head back up to its resting position after each cut was tiring and wasteful of energy and movement. I rigged up a comical but effective foot pedal. When the pedal is depressed, it pulls a rope which runs through a pulley on the ceiling and back to the tensioning knob on the saw head, pulling the head of the saw up enough to clear the work so it can be advanced through the saw more quickly. With the foot pedal in use and the saw in continuous run mode, the cutting of multiple pieces can go very quickly indeed. This "temporary" foot pedal has remained in use to this day. The rope setup is unusual, but it works very well; it is flexible and removable, and I may be starting to like the squeak of those pulleys! These saws also have a vertical position which allows them to be used for "hand cutting" of work. I have seen several homemade base tables which make this operation easier, but neither have I ever found the one that came with my own saw to be inadequate. A note about blades - many blades are available, but for general-purpose work with these saws, you will probably find a 14 tpi (teeth per inch) blade the most useful. I have experimented with larger teeth (they won't cut straight in my saw) and smaller teeth (takes all day to cut a pencil.) So stick with 14 tpi, but consider keeping some other sizes around for those special occasions.
Generally, the more you pay for a blade the better it is. Bimetal blades are great, but are expensive. If you have a blade welder, bi-metal blades require a special welder that is expensive - like $800 expensive. Carbon steel blades will see acceptable service for most smiths, but you may be a little happier with a slightly higher-priced premium blade that lasts a little longer and cuts a bit straighter. Yes, the sharper they are the straighter they seem to cut. One little trick some people swear by is to cut a piece of brass with a new blade before using it on steel. The theory is that it removes the burr and doubles the life of the blade. I'm giving it a try myself, but I can't claim these results. Most people should stick to pre-welded blades. Since we do a lot of cutting, we have invested in a blade welder and it does have some advantages, but not for someone who may only go through a handful of blades every year. So don't snicker the next time you see one of these inexpensive little saws in use. They are worth every penny and more. Return to the Blacksmithing Articles listing page. Return to the ANVIL Online Table of Contents for March, 1998.
|


