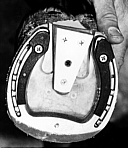
Applying the Equine Digit Support System

© Gene Ovnicek
Photos by Rob Edwards
published in ANVIL Magazine, October 1996
 1. Lateral view of the foot to which EDSS is to be applied. This horse is diagnosed with navicular syndrome. |
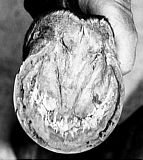 2. Trim exfoliating sole and frog. Trim the tip of the frog enough to determine the true apex. Its relationship to the coffin bone is constant. |
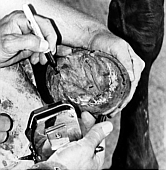 3. Mark the apex of the frog, a point 3/4" behind the apex (which should be the widest part of the foot), the end of the bearing surfaces of the heels, the posterior part of the frog and the end of the heel bulbs. The widest part of the foot is generally the area to which the bars extend. Radiographically, it will line up under the center of articulation. Distortions in the hoof capsule around the coffin bone is what causes hoof pathology. The relationship between the frog and the coffin bone never changes. It is the only true reference, as the hoof capsule distorts under pathological conditions. |
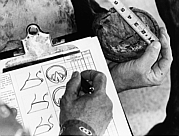 4. A form is provided with the EDSS designed to show distortions from normal hoof shape as indicated by the study of wild horse feet. Measurements will change each time the EDSS is applied until optimal hoof shape is achieved. All measurements are taken from the toe. Major distortions appear first in the toe and then in the heel area. Four hoof shapes are provided on the form and the measurements are written on the shape most resembling the feet to be worked on. |
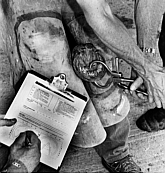 5. There is a direct relationship between hoof deformity and hoof pain. The form has diagrams so that pain response can be recorded. It also provides a way to track the hoof changes. |
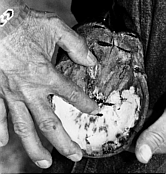 6. The sole is now trimmed to reveal the true sole plane. The tip of the frog is re-marked and a line drawn completely across the foot through the mark indicating the widest part of the hoof. The line is extended slightly up the medial and lateral hoof wall. |
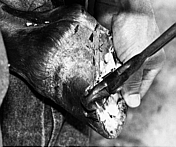 7. Cut a notch in the hoof wall just forward of the heel down to the sole plane. |
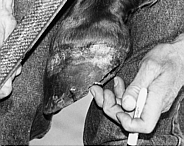 8. Draw a line from the mark on the hoof representing the widest part of the hoof across the top of the notch back through the heel. |
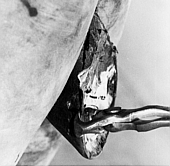 9. Trim along the line. The idea is to create a stable base for the shoe and pad. |
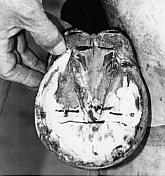 10. When the heel is trimmed back to the widest part of the frog using this method, the placement of the heel moves from a forward position to a rear position. In this case, the base of support is extended 1/2" relative to the opposite heel. The curvature caused by excess heel length is also eliminated. |
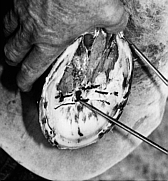 11. After the other heel is trimmed and the hoof rasped flat, the heels can be checked for equal length by use of the dividers. |
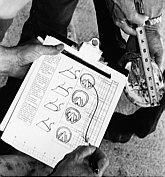 12. After new measurements are taken, it is apparent that the hoof has changed to a more natural shape. The goal is to trim as close to the sole and frog plane as possible and still have ample protection for the coffin bone. |
 13. The best fitting impression pad is selected. Duct tape is applied to the pad prior to mixing the impression material. |
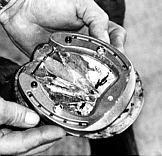 14. The shoe is placed on the foot with the inside border of the shoe lining up with the apex of the frog. The shoe heels should extend beyond the hoof heels by 1/4" to 1/2". The branches are brought together or widened as necessary for proper nailing. A little extra width is required to accommodate the pad. The heels should not be turned in. |
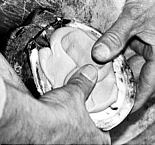 15. The two-part impression material is mixed together and blended in about 30 seconds. Depending on the temperature, it will start to set in about two minutes. The material is placed at the heels and spread forward. |
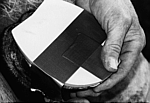 16. The impression pad is applied with downward pressure. Duct tape is wrapped around the hoof and pad and up over the heel bulbs to hold it in place. The opposite foot is held up to get proper fit of impression material, which takes 6 to 10 minutes to cure. |
 17. Meanwhile the clear plastic pad is placed on the shoe with the raised frog portion away from the foot surface. The same stainless steel Phillips head machine screws are used to attach the pad as well as the rails to the shoe. The steel insert fits into the seated-out portion of the shoe. Install the screw from the foot side of the pad and tighten. This causes a cup in the pad, minimizing any contact with the tip of the coffin bone. The excess pad is trimmed off, leaving extra pad at the heels for expansion. |
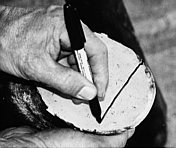 18. The impression pad is removed and excess impression material is removed from the back and side. In cases of laminitis, the impression material is trimmed back to the pre-drawn hoof-testing line. For navicular treatment, the line is re-drawn across the foot (as shown) to mark the apex of the frog, thus identifying the position of shoe placement The impression material enables the frog and digital cushion to be weight bearing. The digital cushion then interacts with the lateral cartilages for normal blood flow within the foot. Energy is transferred through the digital cushion to the interconnecting soft tissues to absorb concussion and to provide support for the back of the coffin bone before complete loading. |
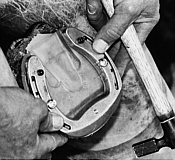 19. The shoe and pad are lined up so that the inside of the shoe matches the apex of the frog and then are nailed on. #5 slim blade nails are preferred for these shoes. Steady, well-placed hammer blows lessen the trauma to the foot. |
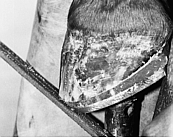 20. The foot is finished normally and the toe taken back as necessary. The horse is walked, turned and trotted, if able, before rails or frog support are applied. |
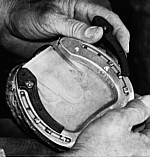 21. "Gut feeling logic" is helpful in determining which size rails and inserts to use. A clear assessment of how the feet are landing should be made before making adjustments. The foot should land slightly heel first. The idea is to reduce the size of the rails as inflammation is reduced and muscle tension is relaxed. If there is any question, the medium rails are put on first. They are positioned to allow for ease in medial/lateral breakover. |
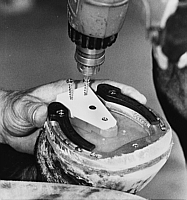 22. The frog pad is applied usually at the same height as the rails, but slightly higher for contracted heels. Self-tapping screws are used to secure the frog inserts and insert caps. |
 23. The finished job. The EDSS can usually be left on for 8 to 12 weeks if the horse is progressing favorably. Testing for pain, taking measurements and filling out the form will show progress accurately and dramatically. |
|
Return to the Farriery Articles listing page.
Return to the ANVIL Online Table of Contents for October, 1996.